
How to Add Your Bank Account Details
Add your IBAN in Document Settings so it appears automatically on every invoice you issue.
By adding your bank account details in Wrapp, your IBAN appears automatically on the invoices you issue, so your customers always know where to pay you. You set this up once and it applies to all your documents.
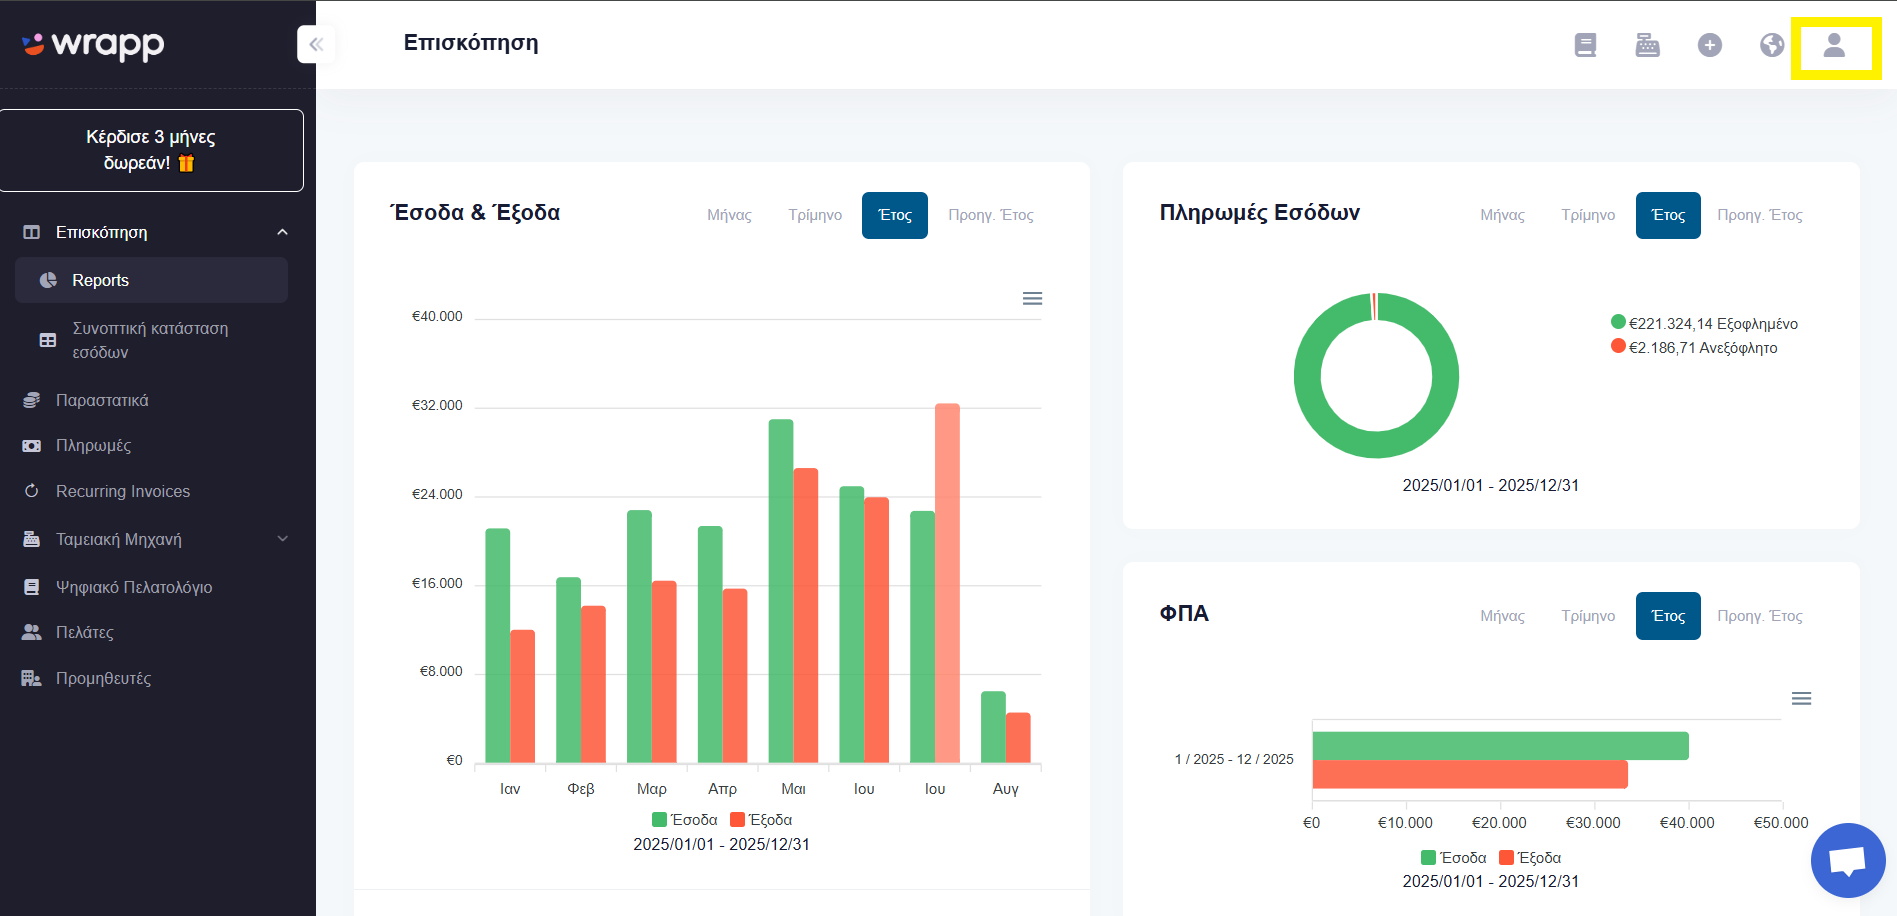
Step 1: Open Settings
From the avatar at the top right, find the Settings menu.
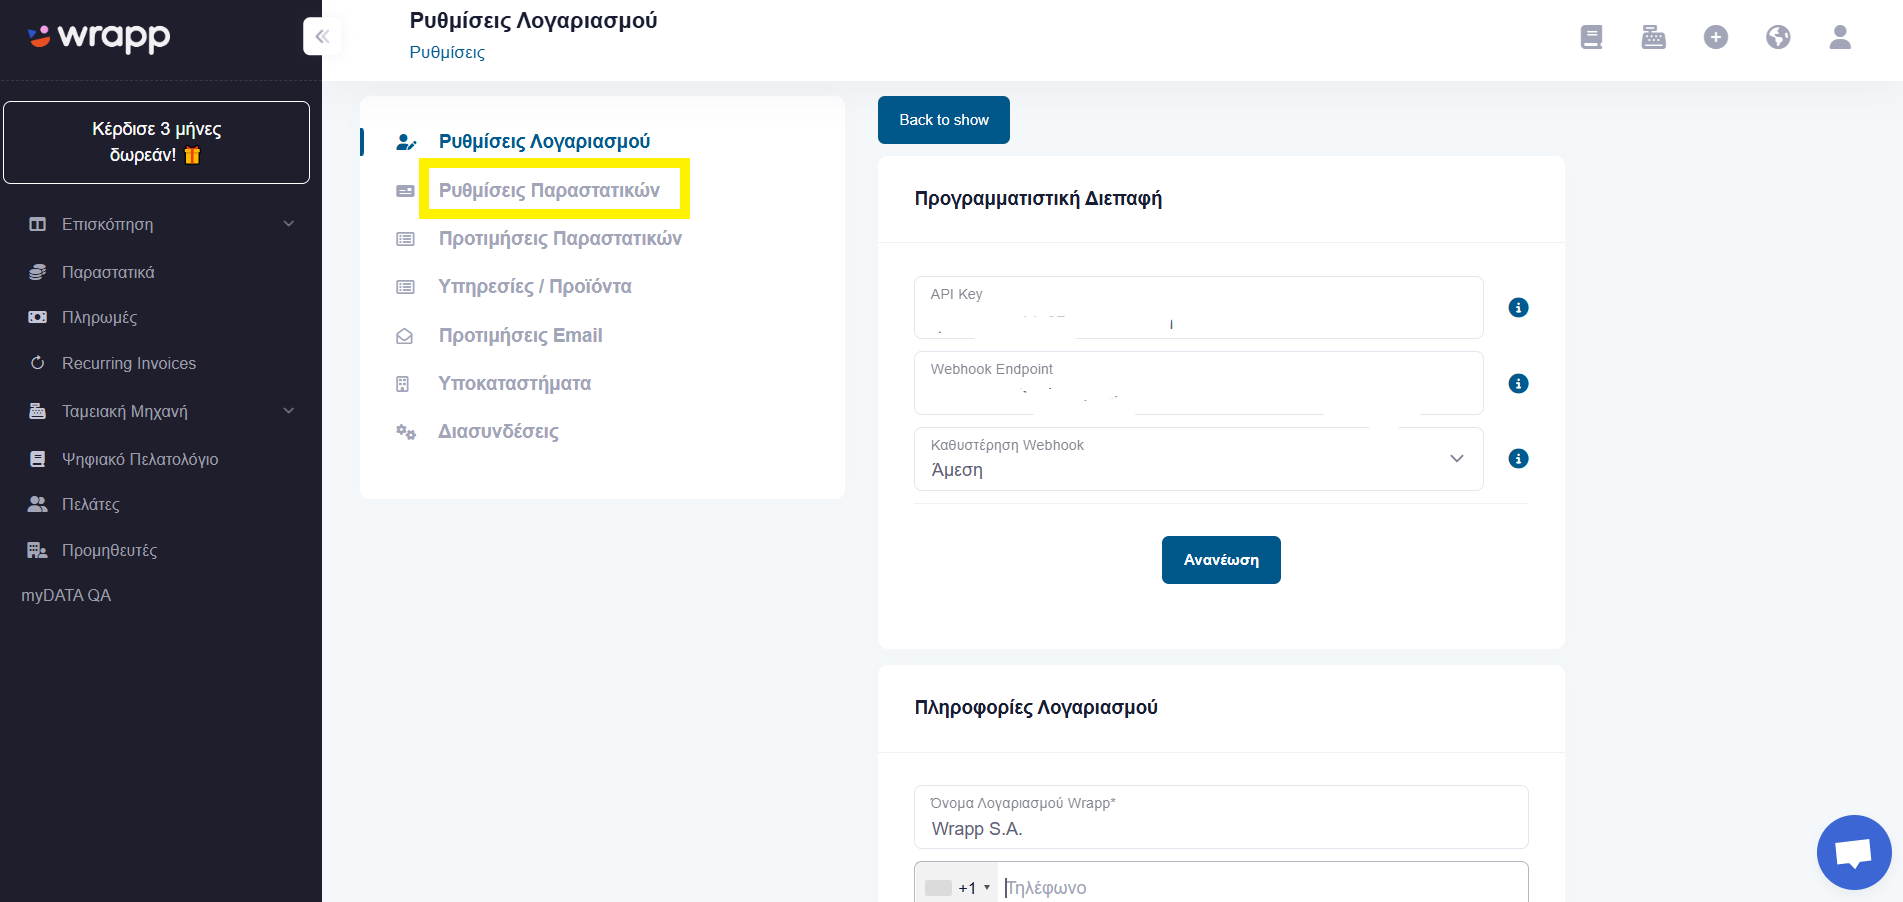
Step 2: Go to Document Settings
Next, go to the Document Settings category.
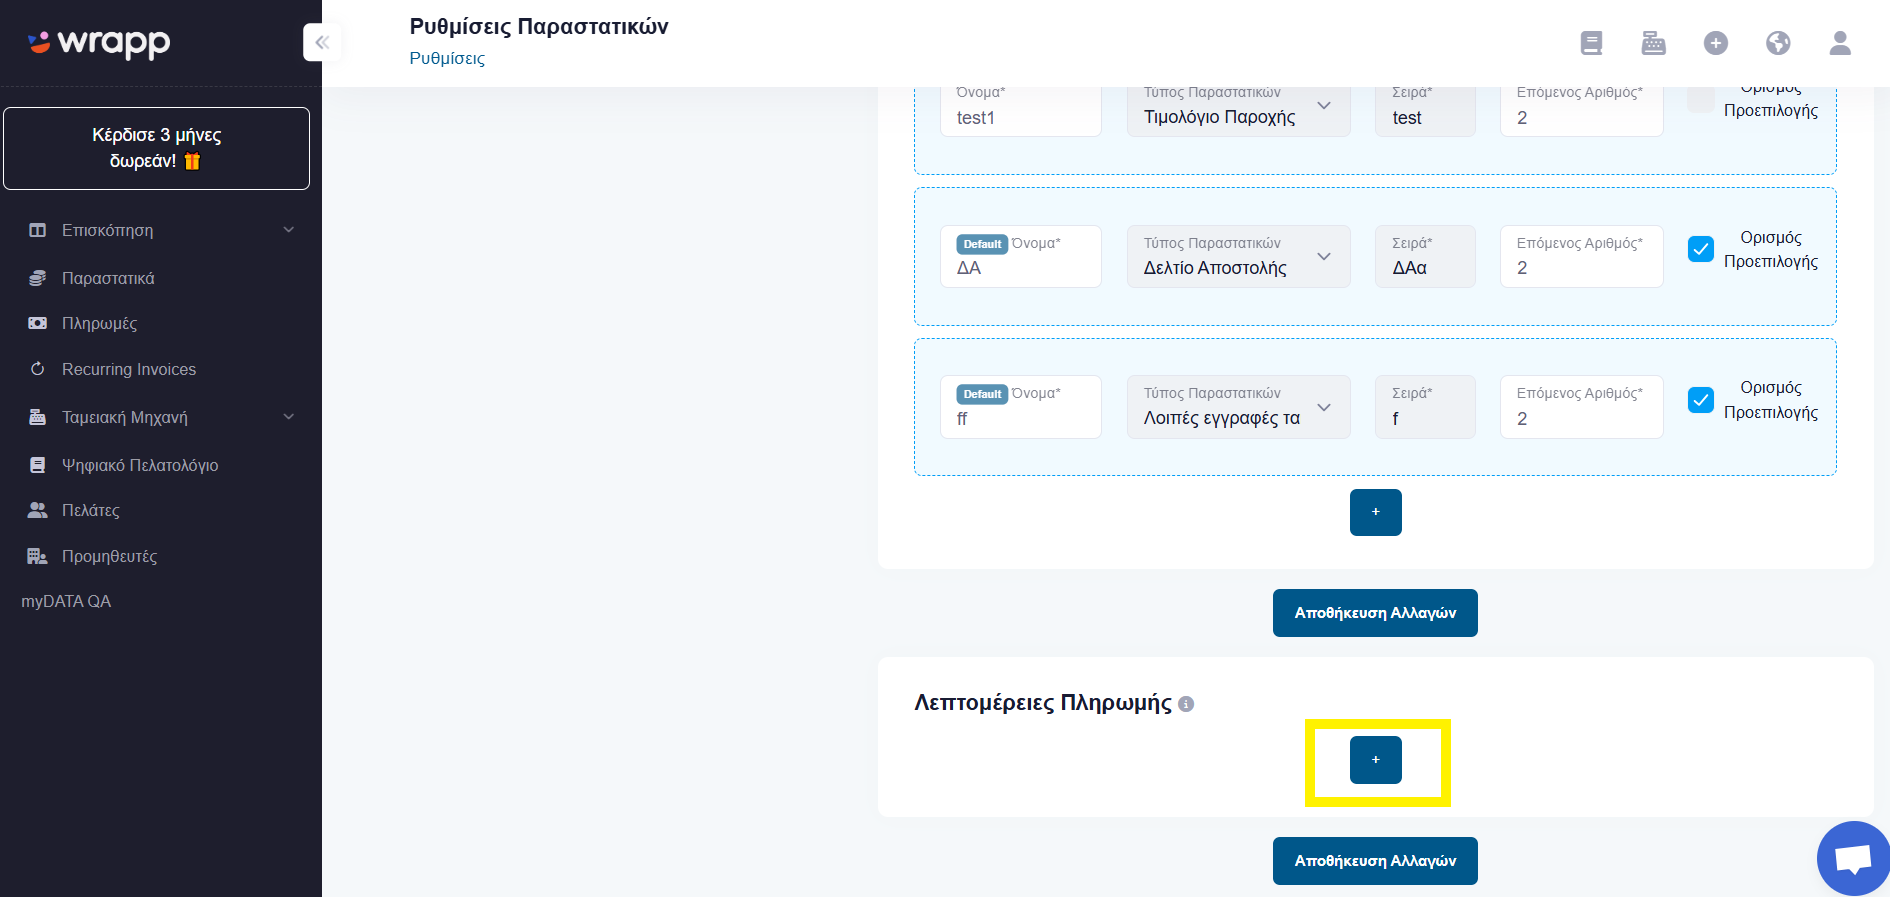
Step 3: Add payment details
Scroll towards the bottom of the screen until you find the Payment Details field and click the + button.
Step 4: Fill in and save
Fill in your bank account details in the corresponding fields and click Save Changes.
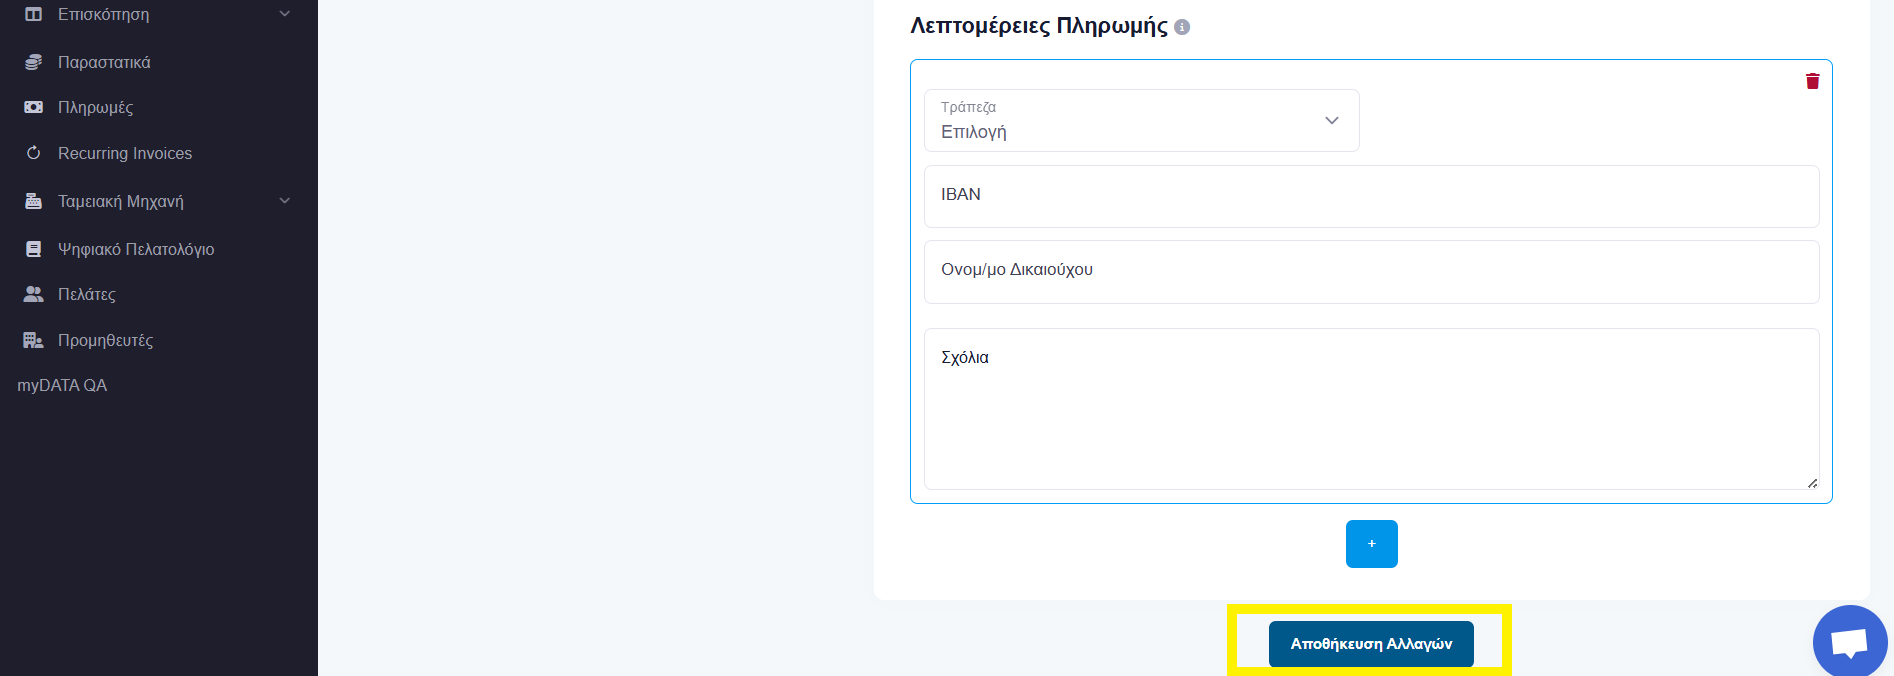
Note: You can add more than one bank account by clicking the + button again for each new account.
Frequently asked questions
Where do I add my IBAN in Wrapp?
From the avatar at the top right go to Settings, then the Document Settings category, find the Payment Details field, click the + button and fill in your account details.
Will my bank account show on my invoices?
Yes. Once you save your details under Payment Details, your IBAN appears on the documents you issue, so customers know exactly where to send payment.
Can I add more than one bank account?
Yes, you can add multiple bank accounts by clicking the + button for each new account under Payment Details.
Does this require any connection to my bank or myDATA?
No. This is simply information printed on your documents. Transmission to myDATA, the platform of AADE (the Greek tax authority), already happens automatically through Wrapp, an AADE-certified e-invoicing provider.
Need help?
If you have a question about this topic or want to make sure everything is set up correctly, contact us and we will look at it together.